Custom Date Heatmap

Nicolas
Last Update 3 tahun yang lalu
Here you can learn how to use the CUSTOM DATE option that you can find under the Date & Time field whenever you're planning a new meeting.

When should you use this option?
We recommend that you use the Custom Date option whenever you need to select specific time slots for your guests to pick from.
In the image below, there's an example of a Custom Date setting.
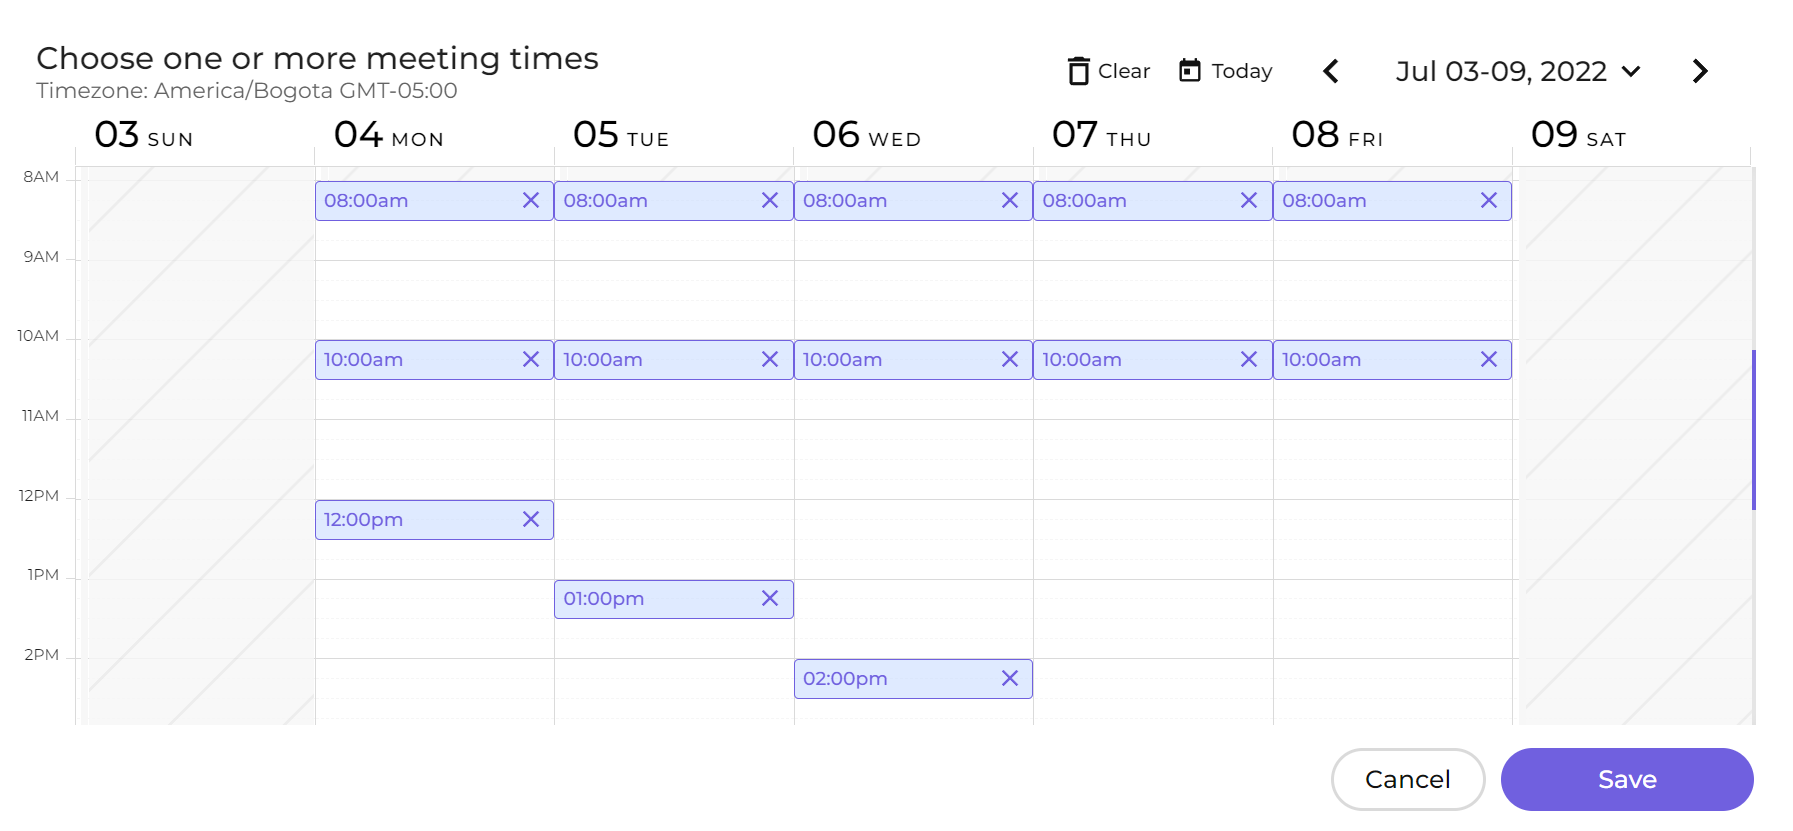
In this scenario, the host is selecting the following time slots/options for their attendees:
Monday to Friday: 8:00 A.M. to 8:30 A.M. & 10:00 A.M. to 10:30 A.M.
Plus, the host decided to add a few extra time slots, described below:
- Monday: 12:00 P.M. to 12:30 P.M.
- Tuesday: 1:00 P.M. to 1:30 P.M.
- Wednesday: 2:00 P.M. to 2:30 P.M.
How can you change the time slot size?
If you want to change the time slot size shown in the calendar tool, all you have to do is go back to the Meeting Form and change the meeting length by updating the Duration field (either using the default options or a custom duration).

Once you have updated this field, you can go again to the Custom Date heatmap, and you will see the time slot size already changed. It's that simple!
Functions & Shortcuts
Here's a short description of the Custom Date's features!
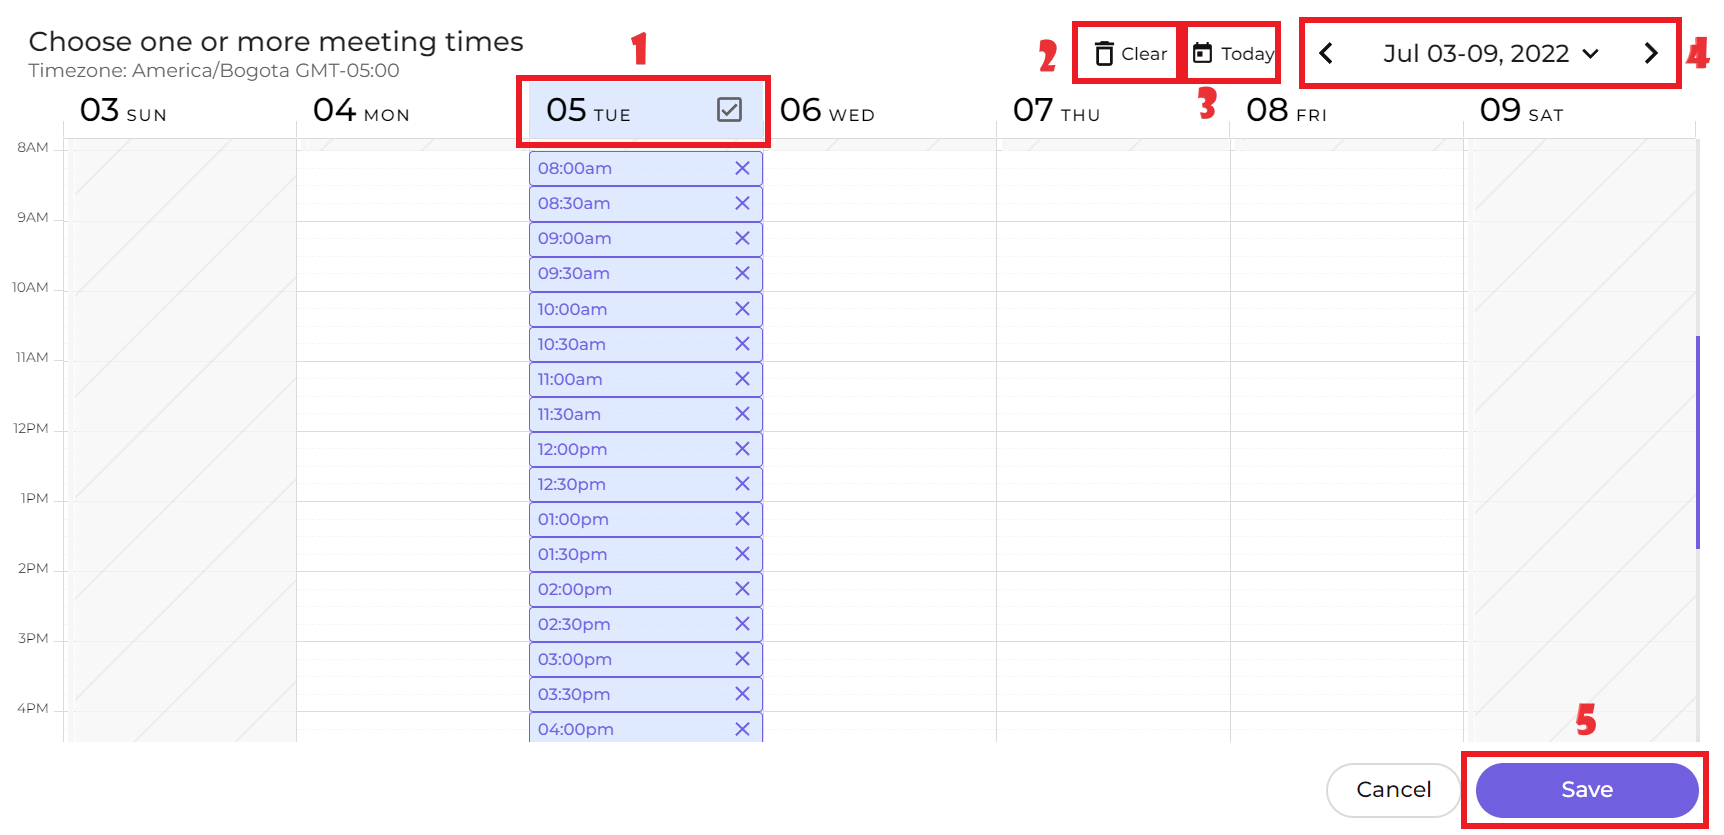
- When you click on a specific day, Letsmeet will add time slots where there's availability. In this case, it added 30 mins time slots, from 8 A.M. to 4 P.M. on July 5th, 2022.
- Clicking on the Clear button will remove ALL time slots already selected, in case you need to start again.
- The Today button is only displayed when you're looking at a week that doesn't include today's date. If you click on it, the calendar will switch weeks to the current one.
- The Date Selector allows you to go to the desired week/day in which you want to select your time slots.
- Lastly, when you already added all the options you needed, click on the Save button. This will lock the time slots selected so you can go back to the form and keep editing, or submit the form if you already completed all other fields.
Blocked Time Slots
With this feature, you can block the time slots you're offering your guests. You may use it whenever you need Letsmeet to create temporary busy events for all the meeting participants (including the host), to prevent anyone from scheduling another meeting on those slots. Check out the image below; you can see the Hold slots option highlighted.

Once the meeting is scheduled, all the blocked slots will be automatically removed from everyone's calendars. These are some things to have in mind:
- It can be enabled only if you selected 10 or fewer time slots.
- You can easily identify these blocked slots in your calendar, as their name will start with a lock icon (🔒).
- You can only block slots on your calendar and in the calendars of colleagues with the same email domain.